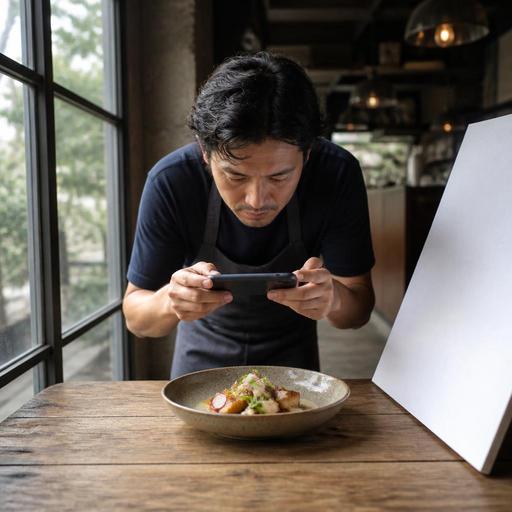
DIY Restaurant Menu Photography: A Practical Guide to Better Food Photos
DIY restaurant menu photography can improve how guests understand your food before they order. For many restaurants, better menu photos do not start with expensive equipment or a full studio setup. They start with a repeatable process: choosing the right dishes, using consistent light, simplifying plating, and organizing images so they stay accurate across printed menus, QR menus, delivery platforms, and social channels.
For restaurant owners and operators, the goal is not to make every dish look theatrical. The goal is to make food look real, appealing, and recognizable when it reaches the table. A useful photo helps guests decide faster, reduces confusion, and sets expectations clearly. That matters whether you run a cafe with a pastry case, a burger concept with online ordering, or a full-service restaurant updating seasonal specials.
Start with a photo plan, not a camera upgrade
The most common mistake in DIY restaurant menu photography is shooting too many items without a plan. Before taking any photos, decide which dishes truly need images. Not every item on the menu requires one. Focus first on dishes that drive orders, need explanation, or represent your brand clearly.
- Best sellers: the items guests ask about most often.
- Signature dishes: plates that define your concept.
- Visually distinctive items: dishes with strong color, texture, or height.
- High-margin items: plates you want to feature more confidently.
- New or seasonal specials: items that benefit from quick promotion.
Create a shot list with the dish name, plating version, angle, garnish, and where the image will be used. A burger photo for a delivery app may need a tighter crop than a hero image for your website. A brunch plate used in a QR menu should show the full composition clearly, while a pastry image for social media can be more detail-focused.
This planning stage also helps operations. If the kitchen knows exactly which dishes will be photographed and how they should look, photo day becomes easier to execute. It also exposes inconsistencies early. If one pasta appears differently depending on who plates it, the camera will reveal that immediately.
Use simple lighting that keeps food looking natural
Good food photography depends more on light than on camera price. In most restaurants, the easiest and most reliable setup is natural window light. Place the dish near a large side window and avoid direct harsh sunlight that creates hard shadows or bright glare on oily surfaces, metal trays, or glossy plates.
If the light is too strong, soften it with a sheer curtain or a thin white cloth placed between the window and the table. If one side of the dish becomes too dark, bounce some light back using a white menu board, foam board, or even plain white cardboard. These simple adjustments often do more than filters or editing apps.
Try to keep your lighting consistent across the whole session. If you shoot one dish in warm late-afternoon light and another under cool overhead fixtures, the menu will feel uneven. Turn off mixed lighting when possible, especially ceiling lights that create yellow or green color casts. Guests may not describe the issue technically, but they will notice when a salad looks fresh in one image and dull in the next.
If you must shoot after dark, use one continuous soft light rather than several different light sources. The aim is still realism. Strong dramatic lighting can work for campaigns, but for menus it often hides portion size, ingredients, or texture.
Style dishes for accuracy, not for tricks
Menu photography should help guests recognize what they will receive. That means styling should improve clarity, not create a misleading version of the dish. Avoid building an unrealistic plate just for the camera if the kitchen cannot reproduce it during service.
Instead, focus on practical styling details:
- Use the standard plateware guests actually receive.
- Prepare the freshest version of the item right before shooting.
- Wipe plate edges to remove drips, fingerprints, and smears.
- Separate key ingredients so they are visible in the frame.
- Reduce visual clutter by removing unnecessary ramekins, packets, or table items.
- Check portion balance so the image matches real service standards.
For example, if you are photographing avocado toast, make sure guests can clearly see the bread, avocado texture, topping, and side garnish. If you are shooting a noodle bowl, lift and shape the noodles slightly so the dish has structure, but keep the bowl true to service size. For a layered cake slice, use a clean knife cut and photograph it before the frosting softens under warm room conditions.
Freshness matters more than complexity. Leafy greens wilt quickly. Sauces lose shine. Fried items soften. Ice cream melts. Build your order of shooting around fragile dishes first, then move to more stable items like sandwiches, baked goods, or bottled drinks.
Choose angles that match the dish and the ordering context
Different foods need different angles. There is no universal best shot. The right angle is the one that shows the structure of the dish clearly and makes the item easy to identify on a small screen.
- Overhead: useful for pizzas, breakfast spreads, salads, mezze, and flat dishes with visible components.
- Three-quarter angle: often ideal for burgers, pasta, plated entrees, and desserts because it shows height and depth.
- Eye-level or low angle: effective for stacked items like sandwiches, pancakes, or layered cakes.
Take a few versions of each dish, but keep the final selection disciplined. Too many inconsistent styles make the menu feel chaotic. A cafe may decide that all pastries are shot at a three-quarter angle on the same surface, while all coffee drinks are shot closer with visible foam texture. A burger restaurant may standardize side-lit three-quarter images for every sandwich to create a strong visual system.
Composition should support menu use. Leave enough breathing room around the plate so the image crops well across website thumbnails, delivery apps, and digital menu cards. Avoid backgrounds that compete with the food. Wood, stone, neutral tabletops, or clean linens usually work better than busy patterns.
Edit lightly and manage images like menu assets
Editing should correct, not reinvent. Adjust brightness, white balance, contrast, and crop so the food looks like it did in real life. Resist heavy saturation or sharpening that makes ingredients look artificial. If the fries were pale, fix the cooking or the lighting next time instead of overediting the image.
Once the photos are ready, organize them carefully. This is where many restaurants lose the benefit of a good shoot. Files end up scattered across phones, chat groups, laptops, and old social posts. Then the wrong image gets uploaded to a QR menu or a discontinued dish stays live online.
Create a simple naming system with the dish name, version, and date. Keep one approved final image per menu item for operational use. Review photos whenever recipes, plating, portion size, or tableware changes. If you run limited-time offers, remove expired images promptly so guests are not ordering based on old visuals.
This is also where digital menu tools help in a practical way. When your restaurant manages QR menus, specials, and item updates in one place, it becomes easier to keep photography aligned with the current menu. A clean image library supports faster updates, clearer presentation, and more consistent guest expectations across channels. Restomas can support that workflow by making menu updates and digital presentation easier to manage as your items change.
Build a repeatable in-house photography routine
The strongest DIY setup is not a one-time photo day. It is a routine your team can repeat. Choose one area of the restaurant with the best light. Store a few simple props there: a reflector board, a neutral surface, a microfiber cloth, and basic plate-styling tools. Write down your preferred angles and editing settings. Train one or two team members to follow the same process every time.
A practical routine might look like this:
- Photograph new seasonal items one week before launch.
- Reshoot top sellers every few months if plating has drifted.
- Review image accuracy during menu updates.
- Save approved files in one shared folder by category.
- Match each image to the correct item in your digital menu system.
Over time, this discipline improves more than photography. It sharpens plating consistency, encourages cleaner menu presentation, and helps marketing move faster because usable assets are always available. Most importantly, it helps guests order with confidence because what they see is clear, current, and believable.
If your restaurant is improving its menu presentation, a platform like Restomas can help you keep photos, item details, and digital menu updates organized in one smoother workflow.